RSS

Tag Archives: diy

DIY herb garden markers

I must confess I am not a huge gardener-I don’t have green fingers, and I always forget to water the plants so generally they die!  But my sister is quite keen on it, so fortunately we have a beautiful herb garden growing thanks to her hard work.  But when I move into my own place, I’m thinking of giving a small herb garden a try (perhaps on the window shelf of the kitchen if space is an issue?).  Herb gardens are easy to manage, grow really well, can be kept in doors (with lots of sunlight though) and give you yummy ingredients for meals-just perfect!

This herb garden really gets me excited!  It shows how you can use something as practical as herbs to create a really great look in your kitchen which compliments the other things on display. Source: Pattern stitch

To help you in your gardening adventures, I thought I would give you some ideas I’ve found on how to make herb markers, to help you remember which herb is which (I’ll definitely be needing that I think!)

Above: These herb markers use ice cream sticks and the words are printed on using stamps. Source: Lil Blue Boo

Above: This is another great (and cheap) way to make the markers.  This just requires paint, old pieces of wood and a steady hand.  I’m not sure if I can be so neat though… Source: By Wilma

Above: These are a bit more complicated to make, but if you have the right materials at home, they are a great idea.  Because they are made out of clay, they will be much more hard-wearing. Source: Wit & Whistle

 
3 Comments

Posted by on September 17, 2012 in DIY, Kitchen


Tags: , , , ,

DIY Dresser Renovation

I have always been a fan of taking an old, but beautiful piece of furniture and giving it a coat of paint to transform it into a modern piece of furniture you can be proud to put in your home.  Next week I’ll show you one piece of furniture I did this with not so long ago, and which has become my dressing table.  But for today’s DIY Monday post, I’m going to show you what some other creative people have managed to do!

Above: I would love to try this out in my house.  If you don’t want to paint the entire dresser because you like the wood, it might be worth modernising it a bit with just some colour blocks like these semi circles.

Above: The before picture.

Above: What a great colour! Wow!  I love the simplicity of the handles and how the colours compliment each other.  This is truly a modern take on an old dresser.

Above: A pretty design for soft, calm room.  This is a cheap way of bringing in interesting designs into the room.

Picture credits:

Pictures 1 & 4: Mr Kate

Pictures 2 & 3: Wrenarian Troves

 
1 Comment

Posted by on September 11, 2012 in Bedroom, DIY, Living room


Tags: , , , ,

A new take on cross stitching

This post comes to you from a fabulous guest blogger, a great friend of mine, Lee Meyers.  Thanks for the inspiration Lee!

At the age of 24, I found the love for a de-stressing activity…cross stitching!  How I came upon it, I am not
too sure! But as I have googled this topic more often, I have found some great ideas.  Have a look, and see for yourself.

To get started, this is the basic stitch. Source: Cross-stitch

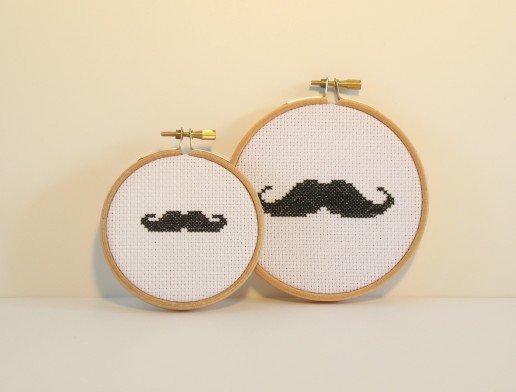
Who could resist such attractive moustaches?! Source: Etsy

Above: For a different take on cross stitching for those not so keen to follow a pattern. Source: Etsy

Above:You could even cross stitch table decorations. Source: Martha Stewart

Above: This is a great idea if you’ve got empty walls that need a bit of artwork, but you’re keen to try something different. Source: Ideas Mag

 
Leave a comment

Posted by on September 7, 2012 in DIY, Inspiration


Tags: , ,

DIY help: A small, round coffee table perhaps?

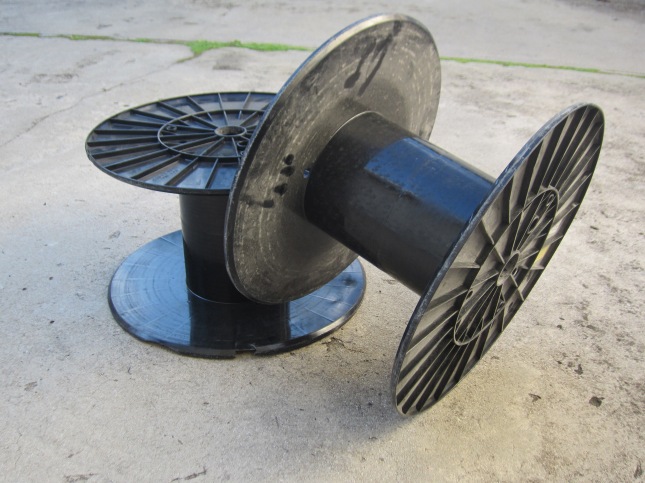
I noticed these oversized plastic cotton reels outside my lecture hall a while back, and wondered what they were for, and why they were just lying on the floor next to the dustbin.  And so with much courage I went on a mission to discover if I could take one-they looked like they could be used to make something fabulous!  I found out that they were used by the ‘cable guys’ but were about to be thrown away.  It didn’t take much for me, after hearing this, to put one under each arm, head home on the bus (which was rather difficult, I won’t lie, as they are quite big!) and start dreaming of what I can do with them.

I have an idea so far, but I’m hoping you will be able to help me.  I was thinking of turning them into little coffee tables.  They are made out of plastic, so by themselves aren’t terribly strong.  But with a good clean/varnish, a piece of solid wood on the top, it could be turned into a great retro table I’m thinking.

Let me know your ideas, and perhaps I could turn them into action!  I have three in total, so the sky’s the limit in terms of what to do with them.

 
5 Comments

Posted by on August 20, 2012 in DIY


Tags: ,

DIY decor

Today’s DIY post is simple, yet oh so striking (and cheap, which I love!)

These bottles are jazzed up using a hot glue gun, and some spray paint.  Just find some old bottles from the recycling, scrub them clean and get the glue gun hot.  Make sure to not mess the hot glue on the jar (something I would do!), because it could look quite messy.

I love how striking, yet simple the one word ‘Love’ is on this bottle.  Once a word is written on the bottle and is dry, use spray paint to quickly paint the jar.  I love how this one uses a paint with a pearl finish-very elegant.  By using spray paint, it will go much quicker than applying paint with a brush and will not cause any lumpy bits to form around the word.

You could use these jars just as decor around your home (in groups of different sizes/colours), or as vases or even as table decor.  The opportunities are limitless.

Thanks to Buzzfeed for this great idea.

 
Leave a comment

Posted by on August 13, 2012 in DIY


Tags: , , , , ,

Bunting to decorate your home

Before the Bunting Craze (yes, that’s what I like to call it-the period when bunting was used for all parties, weddings and any other occasion), I had this marvelous idea to make bunting that I could use in my home one day for decorative purposes.  So I got to work with my sewing machine (was the first time in years!) with some cheap scrap material I bought at a material shop and made these:

I decided to go the slower route and sew two pieces of fabric together (rather than the more common method of just cutting out one piece of fabric and attaching it to the rope).  The reason-I want it to look pretty from up close and I want it to last.

I sewed all three sides closed, just leaving two small corners open at the top.  The thin rope was then strung through the holes and voila!

 
Leave a comment

Posted by on August 6, 2012 in DIY


Tags: , , ,

More seating needed+want to throw out old magazines=let’s make a stool!

I found this great DIY idea on Buzzfeed awhile back.  I think this idea is great because it uses things you already have in your home that are old and are soon going to be hitting the recycling, but alas now they are getting reused!

They used what seems to be quite a fancy  base for their stool.  It looks a bit too complicated and time-consuming for me, so if I were to make it I think I would give that a miss.  Perhaps just pop a piece of hardboard on the bottom which is the same size as the magazines and that would hopefully do the trick.

 
2 Comments

Posted by on July 30, 2012 in DIY, Living room


Tags: , , ,

My completed DIY gold bowls

Having made a post a while back about DIY gold leaf vases, I decided to try it myself, after all that is what this blog is all about!  And finally the project is complete and the bowls can be photographed!

Here they are:

Some things I learnt through this process:

  • I decided not to use the gold leaf, as originally thought.  I spoke to somebody at an art shop and they thought gold paint was just as effective (and a whole lot cheaper!).  I decided to give it a bash, and am really glad.  It looks very striking and you can’t see the paint strokes.  In order to do this, I painted alternate layers in opposite directions, that way the streaks were covered over.
  • I found a can of white gloss spray paint in the garage and used that on the outside.  Using spray paint is way quicker than painting on-I would highly recommend it!  And the gloss makes it look quite snazzy.
  • To make the decoupage, I blew up balloons (not fully though) and with masking tape attached a slice of polystyrene cup to the top of the balloon (which has made the base of the bowl which it now stands on).  As you can see from the pic, the two bowls have different size bases.  The reason-I used the top of the polystyrene cup for the one, and the bottom of the polystyrene cup for the other!
  • I used watered down wood glue for the decoupage, rather than flour and water.  It dried a whole lot quicker and made it far sturdier.  I highly recommend it.
  • I didn’t pop the balloon once I was finished, I simple peeled it away from the hardened decoupage (which was a good 7 layers thick).
  • I made sure to smooth down each and every piece of newspaper, so that there were no bumps, as they tend to get accentuated when the final product is painted.

As you can see, this blog most certainly isn’t here to show off my amazing photographic skills, far from it!  But I hope this has given you a taster of what you can do at home with just some glue, newspaper and some odd paint lying around!

 
2 Comments

Posted by on July 20, 2012 in DIY, Inspiration


Tags: , , , ,

Making furniture using old wooden pallets

Having missed my post on Friday (sorry guys, it was a super busy day-my last day at work!!), I decided to make a post on something I’ve been storing for a while now.  Call it a trick up my sleeve, this one should get you excited to start making furniture for your home!  Let me know which idea you think you would like to give a try…

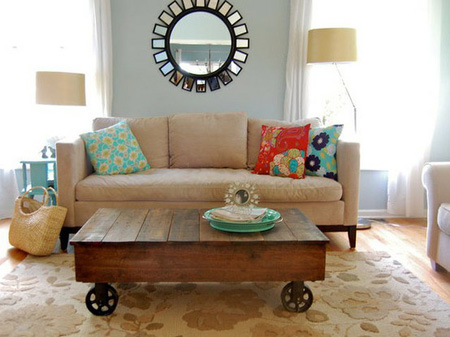
Above:  This coffee table on wheels made from pallets is a cost-effective DIY way to make a striking piece of furniture in your house which is practical as well.

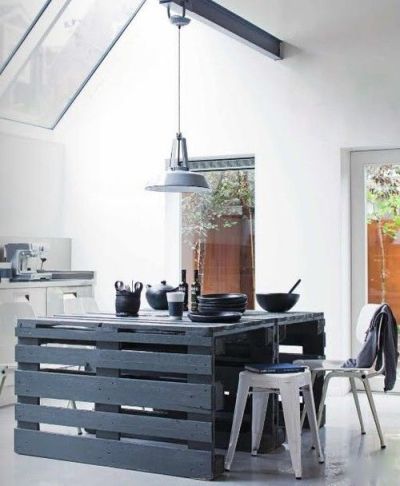
Above:  Often redoing kitchens can be quite expensive, but idea this can be done on a tight budget, and can be tailored to suit your needs, be it a specific height, colour, width etc.

Above:  This daybed made from pallets is super cool.  The wheels might be a bit impractical, but the idea is great.

Above:  Coming from South Africa, the traditional Christmas tree often seems quite out of place at Christmas time.  For a twist on the traditional theme, try this great one.  I’ve made one similar to this before, with wood, but I’m going to try this out one this year.

Above:  Another take on a coffee table, this one is slightly higher and more rustic than the previous pic.  You could also put a piece of glass on the top for a more sophisticated look.

Above: If you’ve got lots to display but no way of doing it, this is a creative way of doing so.  It’s another take on a shelf, but quite quirky and different-it’ll definitely make people notice your pictures!

Above:  I just love this loft-really light and modern, yet affordable too it seems!  The couches are made from pallets, with a simple piece of high density foam covered in fabric on top, followed by lots of cushions to lounge against.

Above:  If you live in a flat, but you hate the bland look of your patio or have itching green fingers, this is a super economical and creative way to add some greenery but not use up too much of that precious patio space.  Simply buy some landscape fabric and staple it to the sides, bottom and back of the pallet.  Place potting soil in the pallet and plant your flowers…voila!  For a more comprehensive tutorial, check this out.

Above: Have a mattress but no base for it?  This is a great way to quickly make a striking platform bed, economically.

Above:  These bookshelves and wine racks have also been made using pallets.

Picture credits:  Pic 1: Home Dzine, Pics 2, 3, 5, 6 & 8: home dit, pics 4, 7, 9 & 10: home dit

 
2 Comments

Posted by on July 16, 2012 in DIY


Tags: , , , , , ,

A Modern Take on the Doily: from a fellow blogger

I thought I would share somebody else’s inspiration today, because I feel you can never get enough inspiration from other people!  Today’s blog comes from handmadeology, a website all about making things yourself-my dream website!  The author of this particular post is Lana, from Joey and Lana Make a House a Home

Here is how they did it:

To get started, you are going to need a few things to make this project successful. Here is a list to get you started:

  • corn starch
  • balloon (we used a 40” blown up until completely round, as pictured)
  • upholstery thread (but any thread will do)
  • twine
  • drop cloth
  • school glue
  • cheap paintbrush
  • petroleum jelly
  • lamp kit
  • 24+ doilies
  • stiff stuff

We sewed the doilies around the balloon with the upholstery thread, very carefully. We simply sewed edge of one doily, to the edge of the next, with some random overlapping.

Make sure to create a space to place your bulb socket. We used some twine, and coiled it inside of a circle we cut out to create a custom fit.

Once you have sewn about ¾ of your balloon, stop and do the last ¼ separately. You will join the two parts together, after you have saturated them together in the solution

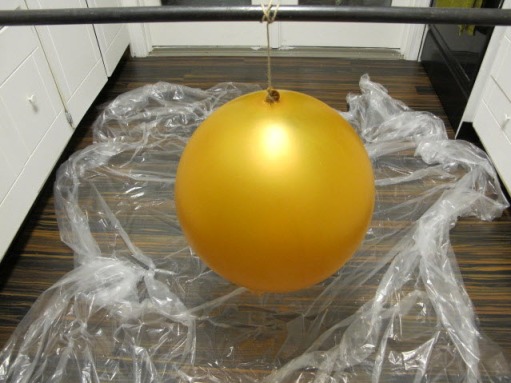
Lay down your tarp and hang your balloon from some twine above the tarp. We placed a large pipe across our kitchen, placing each end on the counter. We have seen people do similar projects using a curtain rod and chairs – it’s up to you. We do suggest however, making sure you have a large tarp laying under your hanging balloon.

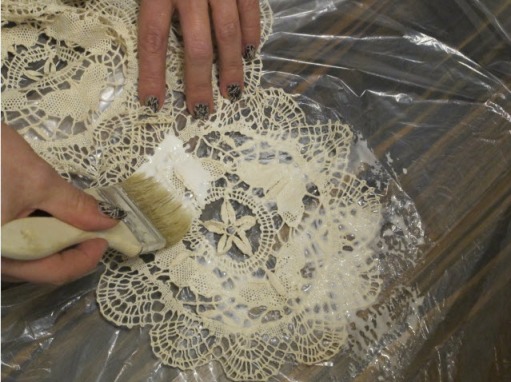
Rub the balloon down with the petroleum jelly. This feels totally weird, and wrong. It kinda made us giggle. Mix 5 oz of the school glue with 4 tbsp of the corn starch and ¼ cup of warm water together until it’s not lumpy. I got this recipe from ruffeled.com, from a string lantern they created, and it worked great! After your solution is smooth, take a cheap paintbrush, and coat the inside of the doily clothes you just created. Try not to use more than ½ of the solution. This is the point where it’s going to get messy, very very messy.

After you have painted the inside of both the doily sheets you have sewn together, place them both on the balloon and line them up to where they connect. Sew the two sheets of doily together. Now, you are probably all dirty from the jelly and the solution, but now you are going to get realllllllly dirty. Use your fingers to cover the whole entire exterior of the doilies with the solution. Yep. Dirty. When you are complete, let your doilies dry for about 24 hours, the pop the balloon!

Use a clear coat to cover the inside and outside of your brand spanking new doily globe! Pretty neat!? Once the clear coat is dry, give it a few hours, you can connect your lamp kit, and hanging it where you like. We decided to cover the cord with twine, to give it a neutral color story, but you can do what you like! Perhaps paint it a variety of colors? Hot pink? Black? So many colors would look great with your new pendant!

 
1 Comment

Posted by on July 11, 2012 in DIY


Tags: , ,